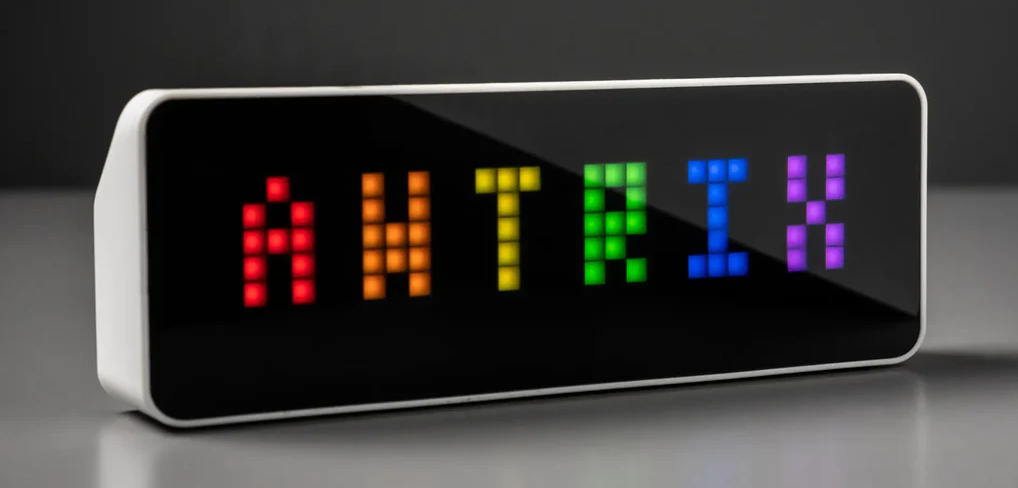
Configuring/Using AWTRIX 3 on the Ulanzi TC001 Through Home Assistant
- Matt Zaske
- July 14, 2025
- 10 minutes
At MMSMOA 2025, in my Home Assistant Happy Hour sessions with Tom Degreef, we used a Ulanzi TC001 pixel clock display to show messages to attendees for a couple demos. It was a neat way to visually display the output we were generating in addition to what could be viewed in the HA interface.
I'd not previously used a TC001 display or anything similar to it, so I was super excited to take some of my new knowledge and play around on my own. I bought my own unit and after MMS was done I decided to set it up for my house. What follows is a bit of a tutorial of my "getting started" with this unit.
Intimidating At First, But Low-Cost
The world of little pixel displays is vast, and they run the gamut of prices. The Ulanzi TC001 is usually in stock and under $50 if you look around so it's a relatively cheap way to play around without breaking the bank. But $50 is $50, and it's intimidating to get started with something like a little display ... "What can I do?" and "What problem does this solve?" are two things that often come to mind for me.
It's Just A Display
Once I fiddled a bit with how it can be used as a display as part of my MMS work, I was sold. To be fair, it's definitely a novelty item, but it's fun to use for notifications and updates. By connecting it to Home Assistant (via MQTT), it's fairly straightforward to push any data point within HA to the display in real-time.
The Ulanzi TC001
When I received the clock I unboxed it and plugged it in to charge for a bit. It's a small device with a USB-C charging port in the center rear. I powered it up by simultaneously pressing the left and right arrow buttons at the top, which wasn't obvious by the instructions provided (I had to look this up online). There's a whole set of things you can do with the clock on its own, but I wasn't interested in any of those. For my use case I want to use HA and custom ESP32 firmware to do fun things, so I spent almost no time fiddling with the official out of box experience.
Enter AWTRIX 3 Firmware
I was planning to use the AWTRIX 3 custom firmware, which was super easy to install. The developer has a mechanism to flash the firmware directly from a web browser! You directly plug the Ulanzi into the computer and use the online Ulanzi Flasher utility to write the custom firmware. The directions are straightforward and simple...seemingly too simple. But it works. I experienced a minor hiccup finding a proper USB cable to let the browser "see" the unit, but once that issue was sorted, I was able to flash the firmware in a few minutes and was running AWTRIX 3 on the display!
It's super awesome that is there's no need understand anything ESP32 or have any tooling available to use AWTRIX firmware "out of the box." That's remarkable compared to how things were just a few years ago, and I'm grateful to the developer for providing this experience!
That's Great, But Now What?
After flashing to AWTRIX 3 I was able to hit the unit's IP and configure Wi-Fi. For the last mile into HA, I followed the steps from BeardedTinkerer's video on setting up and using the TC001 in Home Assistant. This tutorial got me set up with the HACS integration for AWTRIX 3 and things talking to each other via MQTT, which I'd previously set up for other integrations/purposes. I skipped over the advanced sections initially, but they come in useful later for reference. I also skipped the custom HACS integration since I wanted to use the mqtt.publish service, but I could come back to it if need be. I have yet to revisit the decision to skip the integration identified in the video, but it looked cool for a more out of the box option to start pushing data.
So now I have a display that cycles through a few default things: date/time, unit temp, unit humidity, battery, and I can trigger some basic stuff from HA. Now what? How do I actually work with this thing?
Flows and Blueprints For The Win!
Look around on the Internet and you'll see all these blueprint refences. Some are paid, some are free, some are understandable, and some are not. There's a selection of various flows available for AWTRIX for inspiration I found most useful and practical. I already have the Spotify service connected to HA, so I chose the "Awtrix Spotify NowPlaying" flow as a test/example.
It took me a bit of time to figure out (or have it "click") that flows are nothing more than automations in Home Assistant, with MQTT payloads in JSON. Once I "got it," then my mind was opened to the possibilities! Blueprints are similar, but they have to be loaded into HA for you to use, are a bit more structured, and user/UI friendly.
You copy the flow as the YAML of a new automation in HA, edit values accordingly (entity id's, etc.), and save the automation. When I started playing something via Spotify the display immediately started scrolling the song detail!

Now I had the clock display doing something I can roll (or rock...) with!
Custom App Display
Something that took me a bit of time to understand is how this all works together. There are built-in "apps" for the device that are written to file and persist on reboot, but other messages are more transient in that you use a MQTT topic and push your payload to it (e.g. ulanzi/custom/yourappnamehere) for each "display" thing. You push the payload up, and the display will cycle through the apps until you tell it to time out (an argument in your payload) or you push a blank payload to the same topic. This is all covered in the API section of the documentation, which is super useful once you get into doing stuff with AWTRIX.
One of the things you'll work through is downloading icons to the display for use. This is covered in the Icons section of the documentation and also in BeardedTinkerer's video. I have been using the LaMetric Icon Gallery exclusively, but you can curate your own if that's your jam.
My first real personally-made custom app was for displaying our real-time household power usage. Since I have an Emporia VUE monitor with HA integration, this data is already available as an entity, so looking at flows for similar things in the flows gallery for inspiration, I came up with this automation:
alias: Minute Power Consumption to AWTRIX
description: ""
triggers:
  - trigger: state
    entity_id:
      - sensor.main_panel_123_1min
    enabled: true
conditions: []
actions:
  - action: mqtt.publish
    metadata: {}
    data:
      qos: "0"
      topic: ulanzi/custom/power
      payload: |-
        {
          "text": "{{ states("sensor.main_panel_123_1min") | round | int }}W",
          "textCase": 2,
          "color": [255,0,0],
          "icon": "44432",
          "noScroll": true
        }
      evaluate_payload: false
mode: single
The automation is triggered when the 1-minute sensor value changes, uses a custom icon from the LaMetric gallery, and will display the current wattage as the Ulanzi cycles through its apps:

Disabling Built-In Apps
For a few weeks I rolled with this configuration. The Ulanzi sits on a shelf in a spot easily visible from multiple places in the house. But I kept seeing the default built-in apps that I hadn't disabled through the "menu" of the unit (which you access and scroll through via the three buttons at the top of the unit). Since the onboard temp and humidity is not super accurate (or relevant), I wanted to disable them, and I discovered this is possible through direct HTTP calls to the unit's settings API!
To stop displaying the onboard temp and humidity, I used an HTTP POST call similar to this example:
curl --location 'http://ip.of.ulanzi/api/settings' \
--header 'Content-Type: application/json' \
--data '{
    "HUM":false,
    "TEMP":false
}'
I also decided to change the time format to better work with my own House Approval Factor, calling the same /api/settings endpoint with my preferred options in the payload:
{
    "TMODE":"2",
    "TFORMAT":"%l %M"
}
After a reboot of the unit, I no longer saw the temp or humidity, and my time app now had a friendlier look:

More Custom "Apps"
I have since built out additional "apps" that HA pushes to the unit. Each "app" is nothing more than a different MQTT topic in the automation, so for an example I have an "outdoor temp" app using ulanzi/custom/outdoortemp and a temp icon with a tree:
alias: Ulanzi/AWTRIX Outside Temp
description: ""
triggers:
  - trigger: state
    entity_id:
      - sensor.wf_sensors_temperature
    enabled: true
conditions: []
actions:
  - action: mqtt.publish
    metadata: {}
    data:
      qos: "0"
      topic: ulanzi/custom/outdoortemp
      payload: |-
        {
          "text": "{{ states('sensor.wf_sensors_temperature') }}°",
          "textCase": 2,
          "color": [255,125,0],
          "icon": "53084",
          "noScroll": false
        }
      evaluate_payload: false
mode: single
This pushes an update to the unit whenever the temp changes outside. The unit will happily cycle the temp in turn until the next update:

Weather Alerts, Too!
We were under an air quality alert this weekend as I was drafting this post, and being a weather and tech nerd, having worked with the NWS APIs and such before, I decided to fiddle with pushing alert headline text to the unit. The "last mile" setup is much the same as other apps: just text in the JSON payload, though I have much additional logic to generate the text in question due to how NWS API structures data. But it's super cool to see it working!

Examining Running Apps & State
With some HTTP GET requests you can see what's going on with the display:
Using the http://ip.of.ulanzi/api/stats endpoint we get a JSON payload of the current unit's stats:
{
    "bat": 89,
    "bat_raw": 645,
    "type": 0,
    "lux": 122,
    "ldr_raw": 877,
    "ram": 112356,
    "bri": 101,
    "temp": 33,
    "hum": 29,
    "uptime": 179350,
    "wifi_signal": -48,
    "messages": 4688,
    "version": "0.98",
    "indicator1": false,
    "indicator2": false,
    "indicator3": false,
    "app": "nwsalert",
    "uid": "awtrix_55ff90",
    "matrix": true,
    "ip_address": "ip.of.ulanzi"
}
Using the http://ip.of.ulanzi/api/loop endpoint we get a JSON payload of the apps in the loop cycle (by their order):
{
    "Time": 0,
    "Battery": 1,
    "power": 2,
    "hometemp": 3,
    "homehumidity": 4,
    "outoortemp": 5,
    "spotify": 6,
    "nwsalert": 7
}
As I mentioned before, clearing out a running custom app is a matter of sending empty JSON payload to the MQTT topic, with empty payload in a HA automation (independently or an else section of a conditional action) or directly via HTTP:
curl --location --request POST 'http://192.168.3.41/api/custom?name=outdoortemp'The above would immediately end the outdoortemp app until/unless something pushes an update with data.
Where To Next?
Good question! I don't have any specific plans, but now that I've had some time to really dig into the display a bit I'm considering picking up another one or two for informational displays around the house. I already have the "main" tablet display near the front door but having a few targeted displays in other areas of the house might be useful...especially as I look to integrating some voice stuff coming up. Since they can be customized in myriad ways, and since I could also directly poke at the API for notifications, there's a lot of random stuff that could be accomplished!


